Spring Boot AWS Deploy
Find out how to deploy your spring boot app into aws instance
Everybody wants their webapp to be accessed from anywhere and to do that you need to put that on cloud. Amazon Webservices is a place where you can host your app and this can be done for free of cost. Checkout the AWS Free Tier for more info.
Here we will deploy a sample spring boot application into an ElasticBeanstalk service. Now getting started with AWS is a little intimidating even for a developer but you will slowly get the hang of it. You will encounter terms like Security groups, VPC, Key pairs etc. but you will understand all these as we move on.
Step 1. Preparing your war file
This is first and the easiest step and you maybe familiar with this. To package the app as a war file you need to make some changes into your application.
Extend your Spring’s main class (Class containing the main function) from SpringBootServletInitializer and override the configure method.
1 | |
In your pom.xml file add tomcat as a dependency and mention its scope as provided. This tells Spring to exclude its default tomcat and include yours instead.
1 | |
The final name tag specifies the name of your war file. Remember to change the packaging option to war. To build using maven run the command
$ mvn clean install
Maven will delete all the contents of the target folder and download all the dependencies the first time. After a couple of minutes the maven build will succeed and the war file will be generated inside your target folder. This concludes the first step.
Step 2. AWS Deploy
Now fire up the AWS console and login to your account. If you are a new user then the signup process has to be completed. It is a lengthy process but all the instructions are clearly mentioned there itself.
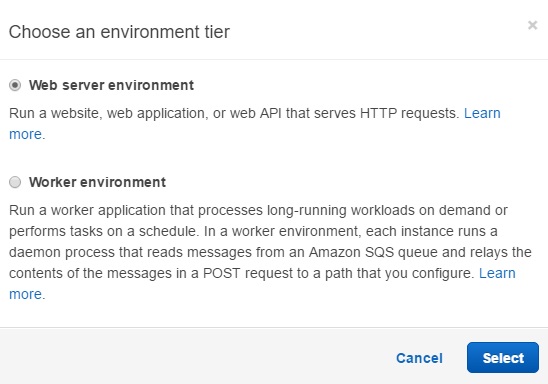
After logging in click on Services and select Elastic Beanstalk from the menu. Create a new application and fill in the name and description. Now create a new environment -> Select the Web server environment in the popup shown below.
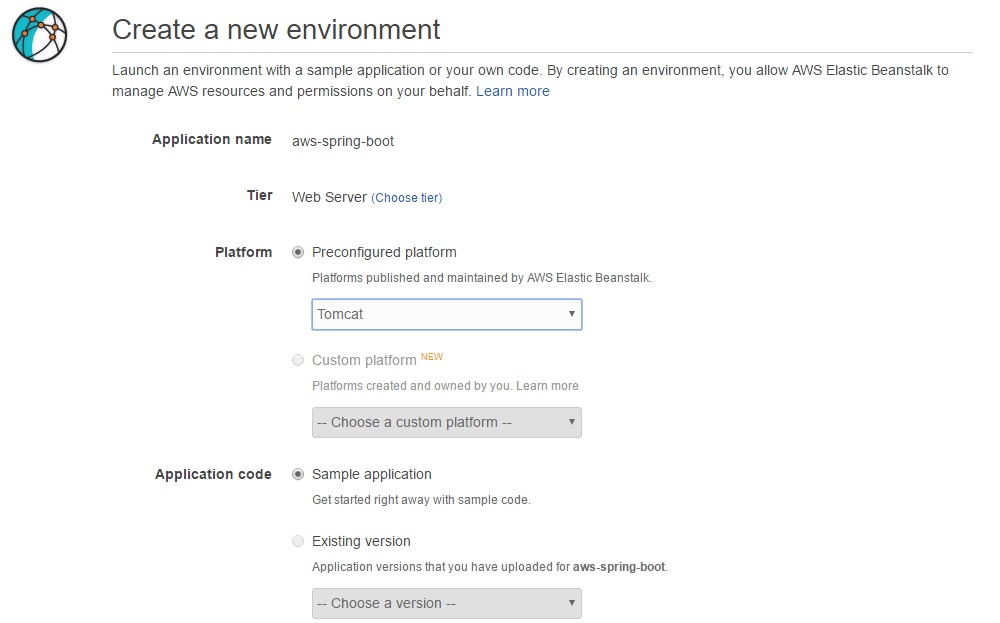
In the platform choose Tomcat from the dropdown. Now scroll down to the bottom and click on Upload your code and upload the war that we generated in the previous step.
After the upload is complete click on Create Environment. Sit back and watch as AWS deploys your application. After the process is complete you can click on the URL mentioned in your Environment Dashboard
What happens behind the scenes was AWS took your configuration (Java, Tomcat), fired up an EC2 instance, setup the Java and Tomcat environment for you and deployed the war file you uploaded.
Congrats!! you just deployed your app.